Archive | November, 2013

Different Dimension Drops of Jupiter

30 Nov

Have you ever caught yourself losing in a polish that was so beautiful, like a drug that you couldn’t peel yourself away from?

I found my soul leaping, jumping and flying through the constellations up in the night sky with Different Dimension Drops of Jupiter on my nails.

Drops of Jupiter is a black jelly filled to the brim with all these holo silver glitters in all shapes and sizes. It swept me off my feet and has gotten me all euphoric. Here’s three coats of Drops of Jupiter on.

20131130-002853.jpg
Here’s some more pictures! Continue reading

Dance Lengend Angel’s Touch

29 Nov

Now that Thanksgiving is over, I’m looking forward to the month of December and the snow it brings us here!

Angel’s Touch is a soft salmon pink creme from Dance Legend’s Touch Me collection. I recently was sent this by a nail mail friend who resides in Russia. Dance Legend is a Russian brand in case if anyone was wondering. Here’s my finished nails using Angel’s Touch, Sinful Colors Snow Me White and various stamping plates by Bundle Monster.

photo(13)

Let’s talk about application. It took three thin coats to even out the small patchy spots that were not fixed by the second coat. Formula is good despite needing three coats. I personally think this color is worth the extra coat. I stamped the snowflakes and the lines using three different Bundle Monster plates. They are, BM-209, BM-319 and BM-323. Snow Me White by Sinful Colors is one of my favorite whites to stamp with because it’s so cheap and works amazing with stamping plates! If you haven’t used it for stamping, please do try!

Where to find the products used here:

Dance Legend polishes can be found at: http://www.dance-legend.com/en/

Sinful Colors can be found in chain drugstores like CVS, Walgreens, et cetera.

Bundle Monster stamping plates can be found at: http://www.bundlemonster.com/

Thanksgivingukkah Nails

26 Nov

This Thursday, November 28th is the only time in our lifetimes is when the first day of Hanukkah falls on the same day as Thanksgiving. This overlap between these two holidays won’t happen again for another 70,000 years. What do you think this Jewish nail polish addict wanted to do besides to eat my momma’s yummy potato latkes?

Thanksgiving + Hanukkah = Thanksgivingukkah nails. You know it!

20131126-234055.jpg Continue reading

Essie’s Toggle To The Top

23 Nov

Hi darlings!
I decided to try out Essie’s Toggle To The Top from their newest winter collection that’s called Shearling Darling.

I love the whole “snowflakes / let there be peace and love on earth” finished look after stamping Essie’s Good As Gold on top of this new polish.

20131123-012609.jpg

Let’s talk about this new polish I got. Toggle To The Top is a very dark vampy red jelly filled with these sparkly red glitters. It’s very gritty and I found applying very thin coats to be helpful in making it easier to work with. It is my understanding that there’s been some complaints about it being very lumpy and/or chunky and that it is very difficult to apply.

This is two coats of Toggle To The Top with one coat of my Glossy Glam topcoat.

20131123-012802.jpg

It’s really pretty! It reminds me Leading Lady from their last year collection. Here’s a bottle/swatch comparison between the two. Leading Lady is on the left and Toggle To The Top is on the right. As you can see, Toggle To The Top is a little darker. Here’s swatches to show the difference. Both colors have two coats on the swatch sticks.

20131123-014159.jpg

I hope you found this comparison helpful! Now the stamping…
I used the snowflakes design on the Cheeky’s Jumbo Plate 6. The plate is called Happy Holidays. Love + Peace is from a Fauxnaud (Konad knock-offs) with QA11 on it.

20131123-015416.jpg

20131123-015434.jpg

This was fun to do! I can’t wait to try out the other 5 colors from Essie’s Shearling Darling collection this weekend! ❤

By The Sea…

17 Nov

My nails today:

20131117-221122.jpg

Close up of the crab because I love it that much!

20131117-221211.jpg

Here’s what I used:
All fingernails except for the ring finger have been painted with OPI’s OPI’s Kiss Me at Midnight (liquid sand) and stamped with OPI’s Alpine Snow.

Stamping plates:
Oyster: Cheeky Jumbo Plate 2 Tropical Holiday

Mermaid: Winstonia W108

Dolphin: Cheeky Jumbo Plate 2 Tropical Holiday

Ring: OPI’s Ski Slope Sweetie. Stamped with Essie’s Good As Gold using Cheeky Jump Plate 2 Tropical Holiday plate for the wavy lines. Painted OPI’s My Favorite Ornament on the tips to make “sand” for the crab. Stamped the crab with OPI’s The Thrill of Brazil using the Winstonia W106 plate. Painted OPI’s Kiss Me at Midnight near cuticles.

Hope you liked it!

Stars!

17 Nov

Stars!

20131117-030415.jpg

I used a couple of things but most importantly the Nailz Craze’s stamping plate NC05 for this manicure.

Polishes used:
OPI Don’t Burst My Bubble
Essie Mojito Madness
Essie Mezmerised
Polish Addict (indie) Dr. Franken
Two of Skin Food polishes. I apologize for not knowing the color names. They’re written in Korean.

First, I painted my nails with OPI Don’t Burst My Bubble.

20131117-030953.jpg

I got my chosen polishes for the stamping plate ready.

20131117-031050.jpg

Here’s the stamping plate I used by Nailz Craze. I’m pointing at the full multi stars print. This is what I used on my ring fingernail.

20131117-031209.jpg

This is how I set the plate up for gradient stamping. I painted a generous amount of various colors on top of the chosen design. You could do lines or blobs all over the place.

20131117-031634.jpg

You will need to work quickly before the polished lines sets in. Take your scraper and scrape in one direction. The excess polish will go on the scraper. Go back to the beginning and use the excess portion that’s on your scraper… and scrape one to two times so it overlaps to create this gradient look.

20131117-031816.jpg

I picked up the gradient stars with a stamper and stamped it on my nail. I also went ahead and did the individual stars on other nails. I stamped a star and topped it off with the Glossy Glam topcoat, then I would stamp another star on top and repeat the process until I was happy with the results.

I painted Dr. Franken by Polish addict on my pinky and thumbnails.

20131117-032518.jpg

I hope this manicure inspires you to do some gradient stamping!
Until next time – xoxo, Rica

Color Blocking with the OPI’s Miss Universe 2013 collection

15 Nov

I love this new trio by OPI! It’s the Miss Universe 2013 collection. The colors in this collection are: I’m Feeling Sashy, This Gown Needs A Crown & Miss You-niverse.

Since it was a trio, I knew I had to use all three for some color blocking nails!

20131115-230851.jpg

Color blocking nails was a breeze to do! I’m heads over heels for these three colors.

20131115-230938.jpg

On the left is I’m Feeling Sashy. It is a dusty medium purple creme. Perfect two coater. Formula was great and I’m a sucker for purples!

In the middle is This Gown Needs A Crown. Holy polish! This is the best silver glittery foil I ever tried in my life. I only had to do two very thin coats for full opacity. Everyone needs This Gown Needs A Crown in their collection. It comes with a cute crown charm and I think it’s perfect because it’s truly the jewel of this delightful trio! This applied absolutely flawless and dried to a smooth finish.

On the right is Miss You-niverse and it’s a dark plum creme. The formula couldn’t be any better. One coat was enough for full opacity. I used only one coat of Miss You-niverse in my color blocking nails.

Here’s another picture of my color blocking nails with this trio.

20131115-231534.jpg

Would I recommend this collection? Yes. I give this collection 5 out of 5 stars. I have a feeling that I will need to get a back up of This Gown Needs A Crown. Overall, I’m very happy and excited about this collection.

To get more information on this collection and it’s availability, you can go to http://www.opi.com

Red + Gold = fun, elegant and festive!

14 Nov

Hello dolls!
My nails are growing to an acceptable “nub” length. I cannot wait for it to get a little bit longer. I have truly missed swatching, reviewing and painting my nails! Here’s my nails tonight:

20131113-234210.jpg

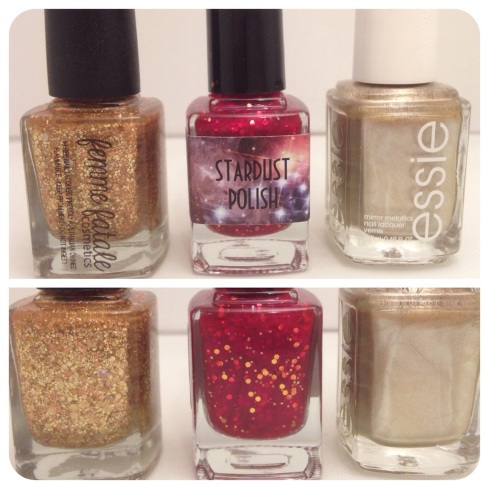
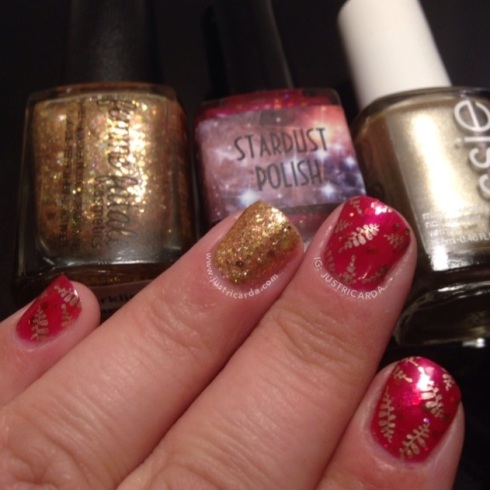
So here’s what I’ve used for today’s manicure. As shown in the picture below from left to right, they are:
Femme Fatale Cosmetics: Sparkling Sands
Stardust Polish: Always Pays His Debts
Essie: Good As Gold

20131113-234305.jpg

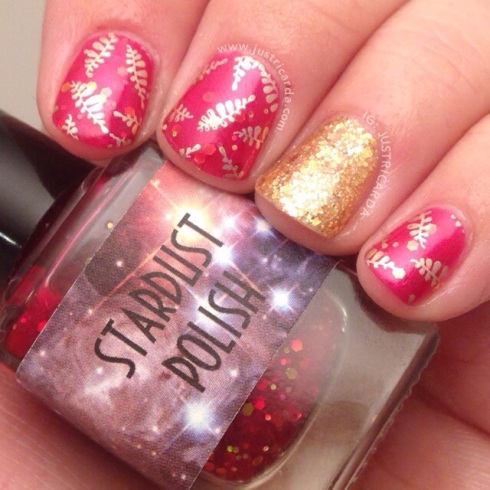
All of my fingernails with an exception to my accent nail have been painted with Stardust Polish’s Always Pays His Debts and stamped with Essie’s Good As Gold. I used Cheeky’s Jumbo Plate 2. It is the tropical holiday themed plate.

20131113-234427.jpg

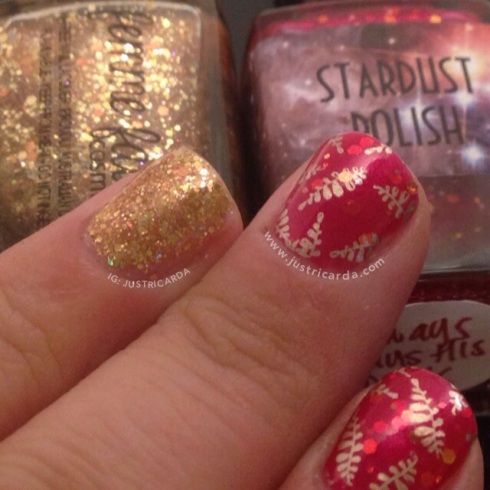
This is two coats of Stardust Polish’s Always Pays His Debts. This polish has been discontinued and it is from her Game of Thrones collection. It’s a bit on the thin side however coverage isn’t an issue at all. It’s a rich sheer-jelly shimmery red polish with these medium gold and small holographic gold glitters in it. Here’s a closer look at Always Pays His Debts.

20131113-234504.jpg

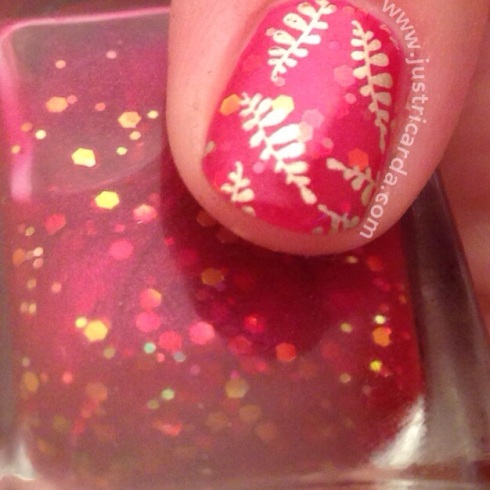
It’s so festive and it made me think of Christmas! Naturally I wanted to pair it up with some gold to dress the manicure up a bit. My favorite gold to stamp with would be Essie’s Good As Gold. It’s so easy and foolproof!

20131113-234618.jpg

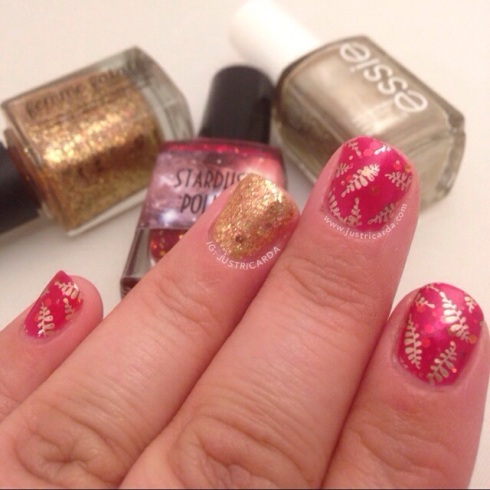
On my accent nail is Femme Fatale Cosmetics’ Sparkling Sands. Sparkling Sands is a shimmery gold base with all these various gold glitters in all shapes and sizes. Femme Fatale Cosmetics is hands down one of my favorite Australian indies! Sparkling Sands in here is three thin coats to full opacity. It is nearly opaque in two coats but by the third coat it was entirely covered. I love love love this so much! So gold and so sparkly!! Application was a breeze. This is the PERFECT gold glitter polish for those seeking full coverage!

20131113-234710.jpg

Isn’t it lovely? Here’s a better look at Sparkling Sands.

20131113-235424.jpg

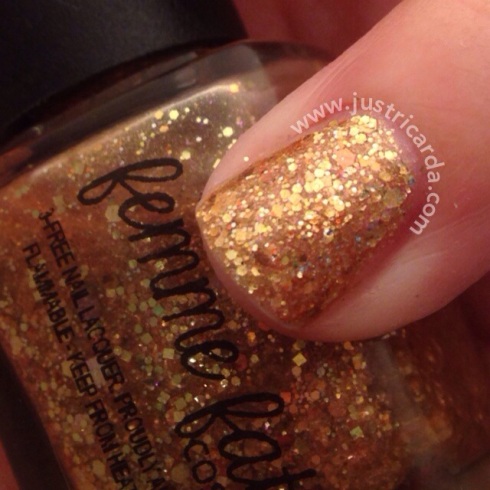
I’m absolutely smitten with with Sparkling Sands! What do you think of this manicure? I hope you like it as much as I do!

Femme Fatale Cosmetics polishes can be found at http://www.femmefatalecosmetics.com.au
Stardust Polishes can be found at http://stardustpolish.bigcartel.com
More information on Good As Gold by Essie can be found at http://www.essie.com

Black Cloud + White Dots = instant nail art!

6 Nov

Here’s my nails of the day!

20131106-230114.jpg

Polishes used:
Orly Bonder base coat
Lime Crime Peaches ❤ Cream
Orly Liquid Vinyl
OPI Alpine Snow
Rica Glossy Glam topcoat

I decided to do something that's simple, easy, and eye catching tonight! This "look" works well on short nails and its very easy to do!

Instructions:
1. Paint your nail with the base color of your choice. I used Lime Crime Peaches Cream for this one. Wait until its completely dry before doing the next step.

2. Begin forming a black "cloud" by using a dotting tool and an opaque black polish. I used Orly Liquid Vinyl. It is an amazing opaque black polish! Begin your dotting from the middle of one side of the nail and work your way up to the top. Make sure the dots are connected but not in a straight linear line. It should look like a beaded necklace.

3. Once the black dotting is complete, take your black polish and paint to fill in the uppermost space to create this partial black "cloud" look. Please wait until the black is dry enough before proceeding to the next step.

4. Take your opaque white polish. I used OPI Alpine Snow. It's opaque in one coat! Use a dotting tool to create white dots on top of this black "cloud" area on your nails. I used a double-end dotting tool that had both large and small tips to create dots of different sizes.

5. Wait until the white is semi-dry before adding the topcoat on.

I hope you enjoyed this simple tutorial!
Goodnight dolls! Stay tuned for more this week 🙂
❤ Rica

I’m back! Frank Llyod Wright inspired mani

6 Nov

Hi lovelies,
I took a little hiatus from blogging to focus on starting off the Rica polish line for a couple of months. I’m back and I’m hoping that you guys are happy I’m back and blogging all about nails.

I had some nasty nail breaks recently so I did have to cut my nails back down to nubs. I apologize for not having long nails for today’s post.

I decided to do something simple. I saw a Frank Lloyd Wright pattern online and decided to use it as inspiration for my nails tonight.

20131105-235849.jpg

Polishes used:
Essie Instant Hot (for white base)
Essie Mint Candy Apple
Essie The More The Merrier
Essie Bouncer It’s Me

What do you think?

20131106-002400.jpg
More posts coming soon ❤
Rica